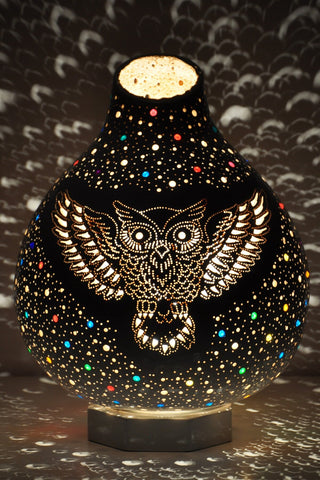
Calabash Lamps Growing in Soil
Share

Well, if we come to our subject, we will talk about how to make a lamp from gourd, how long is its life and how it is done.
First, we provide carefully selected gourds in the most suitable sizes for the lamps we want to make. Average 20x30 cm dimensions are the most commonly used average sizes. People who turn gourds into art often prefer to grow them themselves.
First of all, the gourd is soaked in water to wipe off the crust, rust and mold on the pumpkins and the first dirt, soil is removed from it. Then it is cleaned thoroughly by rubbing it in water with a steel wool made of aluminum. There are those who do this cleaning process with sandpaper, but we do not recommend it very much, it is not very suitable for gourd. Then wait for the pumpkin to dry after cleaning it.
Patterns and motifs designed according to the shape of the dried pumpkin are drawn on the pumpkin. According to the shape, size and smallness of the pumpkin, it can be tulips, carnations, geometric patterns or a miniature painting.

Then, small holes are drilled on the patterns with a small drill with a fine tip. It will be more comfortable for you to use your Dremel as it allows you to easily give the rich tips, that is, the pattern you want, and to better fit your hand. With the delicacy of the motifs, it may be necessary to drill an average of 1500 – 3000 holes on a gourd. Then, one of the most enjoyable parts of the job is to decorate the holes with beads, and you can use beads and colors according to your own imagination. We place the beads in the holes, then we beat those beads so that they fit well into the holes, and finally we place a light bulb inside the pumpkin. A thin varnish is applied as a final finish. Apart from this, if desired, the top of the pumpkin can be colored with any water-based paint and varnish is applied.
